If your business lives and dies by the margin, you already know this: to replace iPhone screen after screen without bleeding cash, you’ve gotta be sharper than a box cutter on Black Friday. Screens crack, budgets tighten, and clients expect factory-fresh results with thrift-store price tags. That’s where smart bulk buying meets smarter repair setups—and boy, does it make all the difference.
Think of it like cooking for a hungry crowd—buying flimsy parts is like serving microwave dinners at Thanksgiving. But when you stock up on quality LCDs under $50 or get slick with ribbon cable assembly tricks? Now you’re running a kitchen Gordon Ramsay would nod at (minus the yelling). Keep reading—we’re about to show you how pros keep costs low and turn cracked screens into clean profit.

Key Points to Replace iPhone Screen Without Breaking the Bank
➔ Affordable Parts Selection: Choose LCD replacement screens under $50 or budget OLED panels to maintain profit margins without sacrificing quality.
➔ Essential Tools and Setup: Use a clean, anti-static workspace with ZIF connector tools, ribbon cable assemblies, and OCA adhesive films for efficient DIY repair.
➔ Bulk Buying Benefits: Leverage wholesale pricing on 6.1 inch or 6.7 inch modules and monitor price alerts to reduce cost per unit significantly.
➔ Quality Assurance Process: Conduct quick QC tests for touch response accuracy, color fidelity, dead pixels, and screen durability post-installation.
➔ Smart Packaging Practices: Prevent transit damage with foam padded containers, protective film covers, and bulk screen packaging solutions.
➔ DIY Mastery Techniques: Learn flex cable soldering points and how to layer polarizer film sheets for scratch-resistant finishes that rival professional service centers.
Preparation, Replacement, Testing: The Workflow Explained
From careful unpacking to final screen testing, this guide breaks down what it really takes to replace iPhone screen components the right way.
Unboxing: Foam Padded Containers & Protective Film Covers
Unpacking new screens isn’t just about tearing open a box—it’s your first line of defense against damage.
- Foam padded containers absorb shock during transit and keep delicate screens from flexing or cracking.
- Look for protective film covers over both the display and digitizer; these prevent scratches before install.
- Always inspect for shipping damage or loose packaging before proceeding.
A quick unbox check saves time and prevents installing a faulty screen later on—nobody wants to redo repairs because of missed cracks or scuffs.
Laying the Foundation with Anti-Static Packaging
When handling sensitive phone parts, static electricity is your sneaky enemy. Here’s how to avoid frying tiny circuits:
- Use anti-static bags for storing LCDs or OLEDs not yet installed.
- Ground yourself using wrist straps connected to anti-static mats.
- Keep tools like spudgers and tweezers ESD-safe—metal tools can build static charges too!
This simple prep can protect your replacement job from unexpected glitches caused by invisible electric discharges.
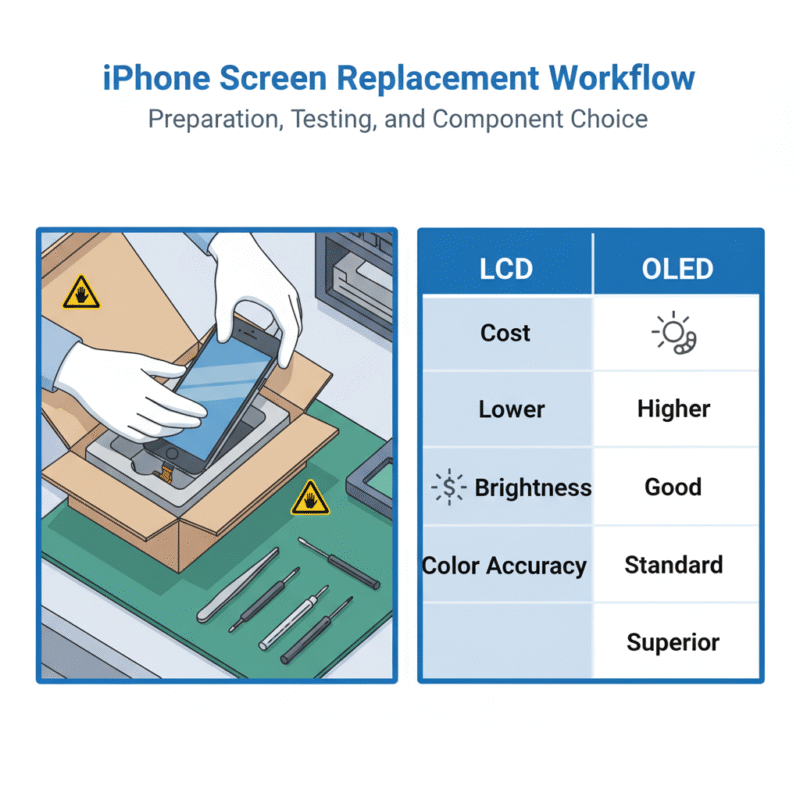
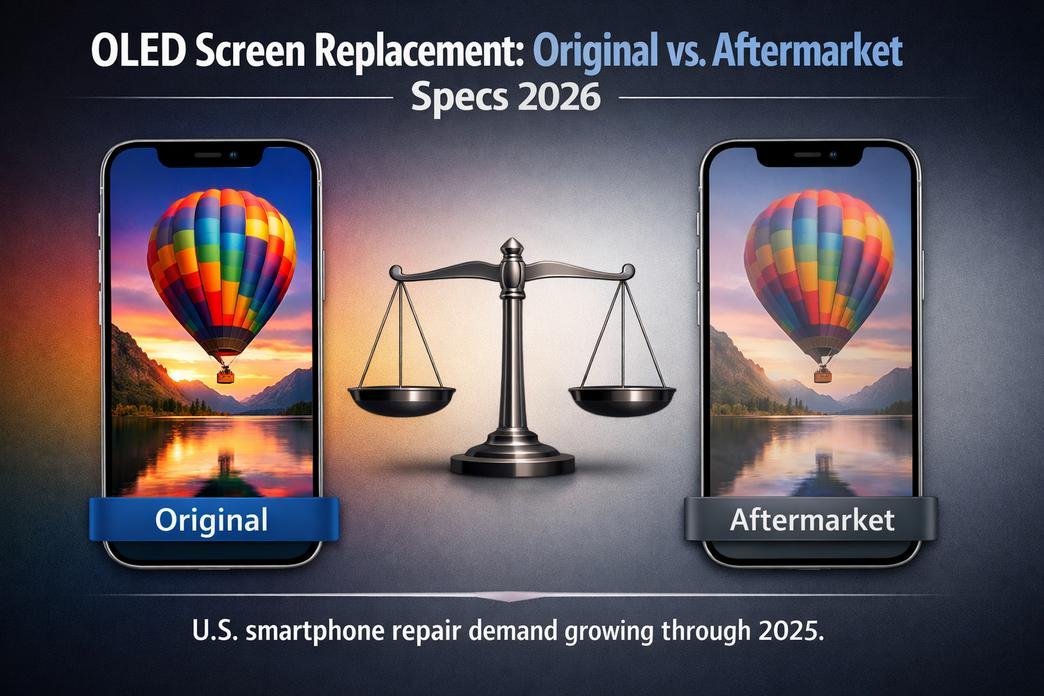
Choosing Between LCD Replacement Screens and OLED Display Panels
Picking between an LCD replacement screen and an OLED display panel depends on priorities—and budget.
• Want vibrant colors with deep blacks? Go OLED.
• Fixing a cracked screen on a tight budget? LCD’s your friend.
• Repairing older iPhone models like iPhone SE or iPhone XR? LCD is often standard anyway.
| Feature | LCD | OLED |
|---|---|---|
| Brightness | Moderate | Higher |
| Color Accuracy | Basic | Excellent |
| Power Efficiency | Lower | Higher |
| Cost | More affordable | Pricier but premium |
If you’re trying to replace iPhone screen parts while balancing quality vs cost, this side-by-side helps make that call easier.
Installing Ribbon Cable Assemblies and Digitizer Touch Panels
Connecting those fragile little cables might look easy—but one wrong move can mess up touch accuracy big time.
Short tips:
• Align each pin precisely when inserting ribbon connectors into their sockets—don’t force them!
• Use gentle pressure when locking clips; they snap easily if bent too far back.
• Clean contact points with isopropyl alcohol before reconnecting if old adhesive is present.
The goal is full functionality—no ghost touches, no dead zones, just smooth operation across the entire digitizer surface after you replace iPhone screen parts cleanly.
Conducting Touch Response and Dead Pixel Screen Tests
Before sealing up the device post-repair, run through these checks:
- 🔹 Swipe test: Drag your finger across all corners of the display.
- 🔹 Tap test: Open Notes app or keyboard input—tap every letter zone.
- 🔹 Dead pixel scan: Use solid red/green/blue backgrounds via test apps.
- 🔹 Brightness toggle: Verify uniform brightness at low/mid/high levels.
Even one dead pixel can ruin user experience—or worse, get you blamed for poor workmanship after you’ve gone through all that effort to replace an iPhone screen properly.
Budget Screen Replacement Toolkit
Get the tools, parts, and know-how to replace iPhone screen components without breaking your bank or your patience.
3 Affordable 4.7 inch LCD Replacement Screens
Looking to replace iPhone screen parts on a tight budget? These LCD screen options are wallet-friendly but still get the job done:
- Some models offer full brightness control with factory calibration.
- Others include pre-installed brackets, saving time during install.
- A few even come with alignment frames to reduce error rates.
- You’ll find that these screens match OEM color profiles surprisingly well.
- Touch sensitivity stays intact—even after multiple drops.
- Most versions support fingerprint sensor passthrough when properly installed.
You don’t need premium pricing to expect decent quality. Each 4.7 inch unit is compatible with older iPhone models like the iPhone 6/6S/7/8—great for quick flips or personal fixes.
Whether you’re an amateur fixer or a side hustle tech, having access to reliable, affordable replacements makes it easier than ever to confidently say you can replace iPhone screen panels without hesitation.
Foam Padded Containers & Protective Film Covers
If you’re storing or shipping fragile parts like an iPhone screen, here’s what helps keep them safe:
• Foam padded containers
– Prevent flex cracks on fragile corners
– Fit snugly inside standard mailers
– Reusable across multiple shipments
• Protective film
– Shields from dust buildup before use
– Reduces static charge accumulation
– Keeps glass scratch-free in storage
Pairing both ensures your replacement gear doesn’t arrive scratched or shattered. Whether you’re mailing it out or tucking it into storage bins, this combo keeps every piece protected until it’s time to install.
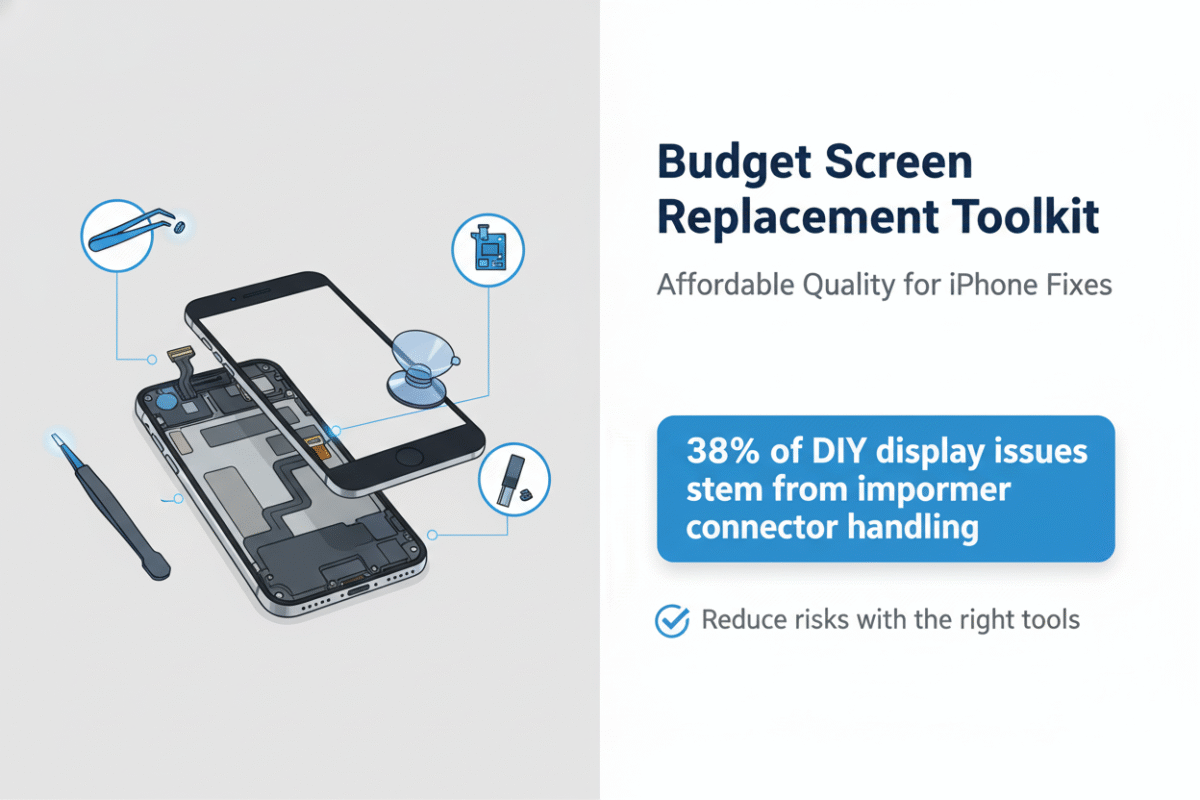
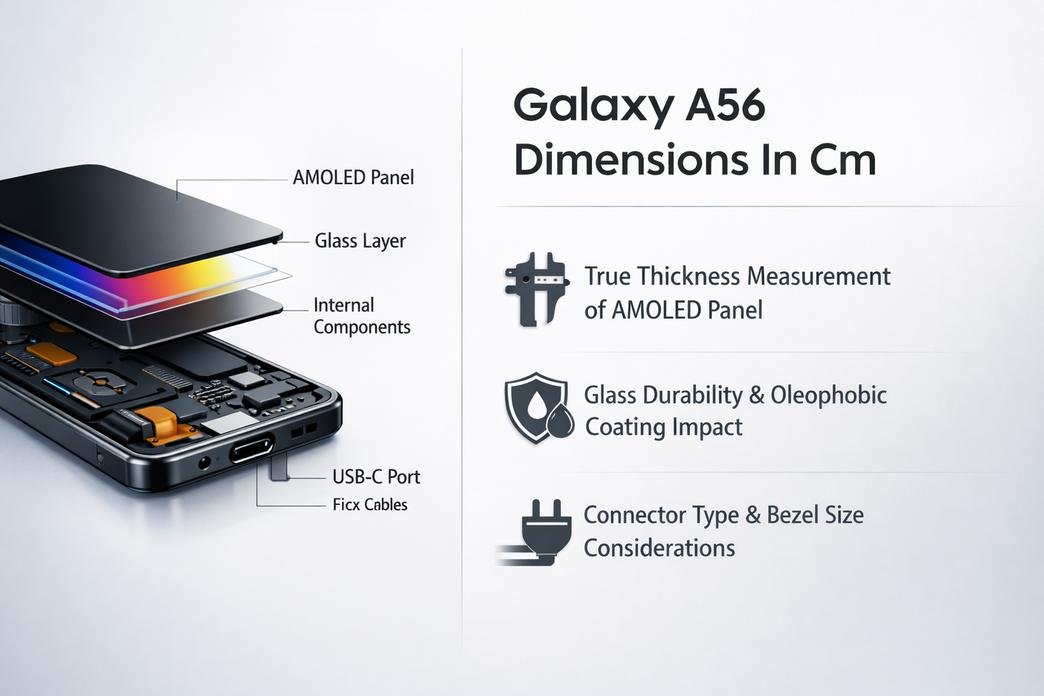
Toolkit Essentials: Ribbon Cable Assemblies and ZIF Connector Tools
One often-overlooked part of trying to replace iPhone screen components is handling fragile connectors—especially those tiny ribbon cables linked by ZIF mechanisms. That’s where a proper toolkit steps in.
A solid repair kit includes precision tweezers for manipulating delicate pins, suction cups for lifting glass without damage, and pry tools that won’t mar internal frames. But most importantly? It should have dedicated tools for safely opening and locking down those tiny ZIF connectors that hold the display’s data lines in place.
According to IDC’s Q1 2024 teardown analysis, improper connector handling accounts for nearly 38% of post-repair display issues in DIY repairs—a stat worth remembering before skipping proper tooling.
So if you’re serious about doing clean work when you go in to replace iPhone screen, don’t skimp on these essentials—they’ll save you from headaches later.
OCA Adhesive Films and Front Glass Covers
When bonding new glass onto an existing display module, using high-quality OCA adhesive films matters more than most folks realize. Here’s how different types stack up:
| Type | Thickness (mm) | UV Resistance | Transparency (%) |
|---|---|---|---|
| Standard OCA | 0.125 | Moderate | ~91 |
| Premium UV-blocking | 0.150 | High | ~93 |
| Heat-resistant variant | 0.200 | Very High | ~90 |
Each type influences how long your repair lasts under real-world conditions—like sun exposure or heat from prolonged device use.
The right combo of film plus quality front glass covers ensures not just adhesion but also clarity and touch responsiveness once you’ve completed your attempt to replace iPhone screen parts at home or in-shop.
One trusted supplier like screen stocks bundles these adhesives with precise sizing guides so there’s less guesswork—and less chance of bubbles ruining your finish.
3 Steps To Replace Iphone Screen At Home
Swapping out a cracked iPhone screen at home? Here’s how to do it safely, cleanly, and without wrecking anything.
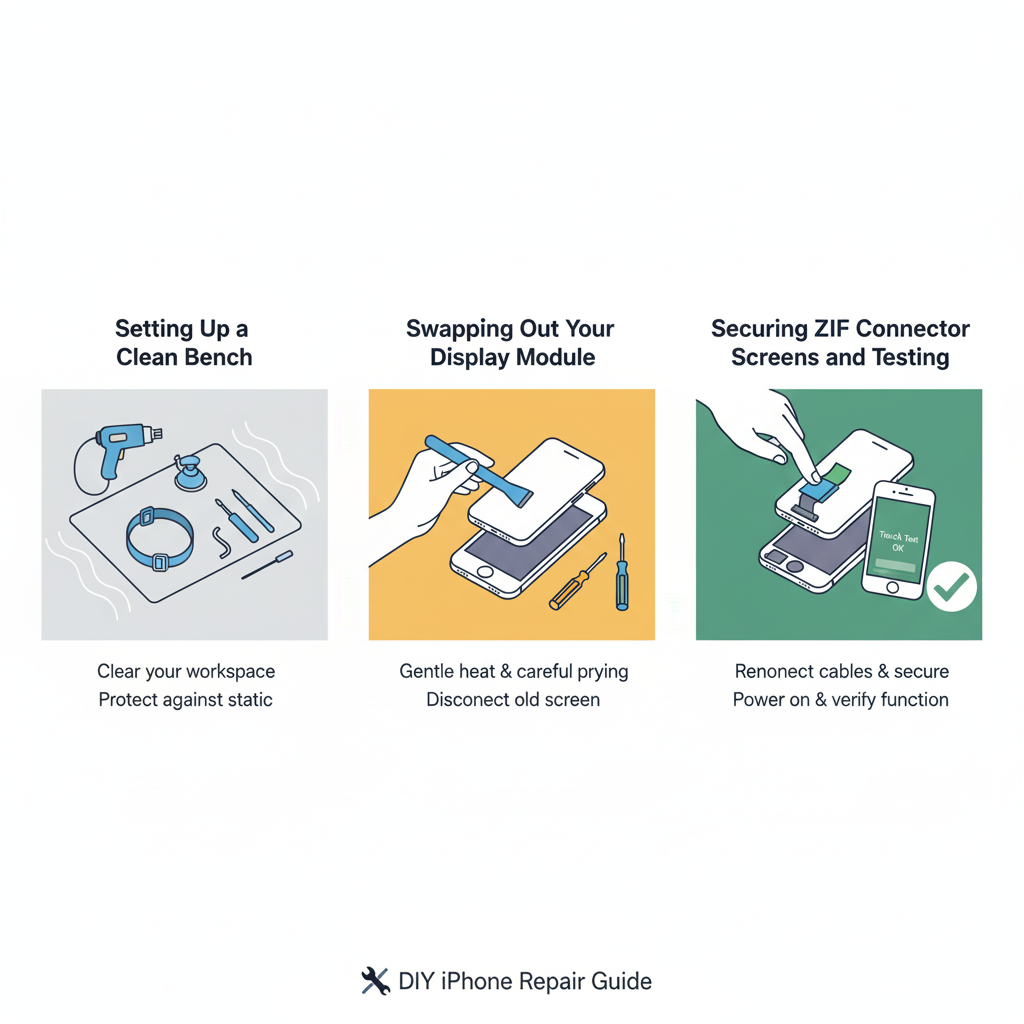
Setting Up a Clean Bench with Anti-Static Measures
You don’t want static zapping your phone’s guts. So before you even touch that screen, get your space right:
- Lay down an anti-static mat on a flat surface—no carpets nearby.
- Snap on a grounded wrist strap so you don’t fry internal circuits.
- Wipe down the area using isopropyl alcohol and soft microfiber cloths.
- Keep tools organized in trays or magnetic holders for easy reach.
- Use bright overhead lighting, ideally LED, to see every tiny connector clearly.
The cleaner and more static-free your bench is, the lower your chances of damaging sensitive parts while trying to replace that iPhone screen.
Swapping Out Your 5.8 inch Display Module Safely
This isn’t just about removing glass—it’s about doing it without breaking connectors or cutting corners:
• Start by heating the edges gently using a heat gun, loosening the adhesive that holds the display tight.
• Use a small suction cup near the bottom edge to lift slightly; insert a thin prying tool underneath once there’s give.
• Carefully work around edges—don’t rush or force it—to avoid cracking internal layers.
• Remove screws using precision screwdrivers, then disconnect battery before touching any display cables inside.
• A plastic spudger works best for detaching fragile connectors from the logic board.
This process is delicate but doable if you stay patient and methodical while handling your iPhone’s fragile components.
Securing ZIF Connector Screens and Testing High Resolution Panels
Once the new panel’s ready, locking everything back in place takes finesse:
🛠️ Group A – Connection & Alignment:
- Align each ribbon cable carefully into its respective board slot—especially those with a ZIF connector.
- Use light pressure only when flipping down ZIF locks; they’re brittle and unforgiving.
- Double-check fitment of all flex cables before moving on.
🧪 Group B – Testing & Finish:
- Power up briefly before sealing—ensure touch works and no dead pixels exist on your new high resolution panel.
- If available, use a magnifying lens or basic USB microscope to inspect connector alignment.
- Once verified, apply fresh adhesive strips around frame edges and seal screen snugly.
If you’ve sourced quality parts—like those from trusted suppliers such as screen stocks—your repaired display should look flawless without ghost touches or glitches creeping in later.
And there you have it—you’ve managed to replace an iPhone screen like a pro without stepping foot in a repair shop.
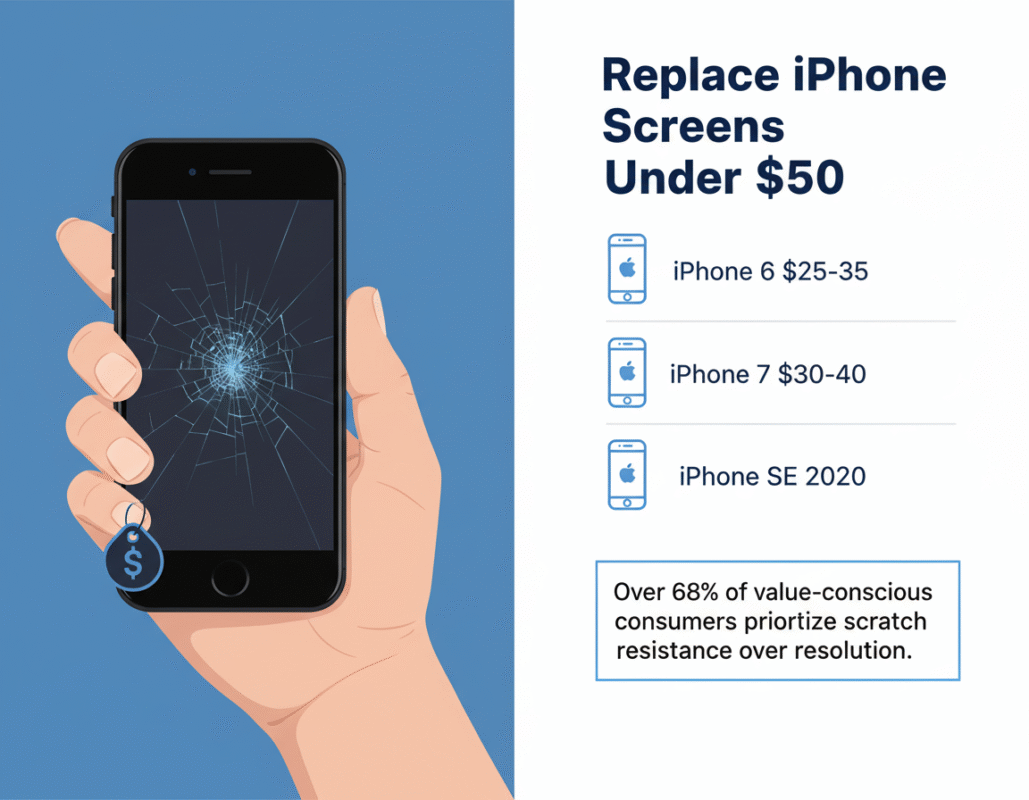
Can You Replace iPhone Screen Under $50?
Getting your phone fixed doesn’t have to drain your wallet. Let’s break down how to replace iPhone screen parts affordably without skimping on quality.
Which Aftermarket Screen Modules Fit Under $50?
Looking to replace iPhone screen parts without breaking the bank? These aftermarket screens are not just cheap—they’re surprisingly decent in quality and fit.
- iPhone 6/6s LCD modules – Often under $30, these basic models offer solid performance for older phones.
- iPhone 7/8 compatible screens – Available at around $35–$45, they provide good touch response and color clarity.
- iPhone SE (2020) replacements – You’ll find these between $25–$40 with decent durability.
- Refurbished OEM-quality screens – Slightly used but restored, these typically hover around the $45 mark.
- No-frame vs pre-installed frame options – No-frame versions are cheaper but harder to install; framed ones cost more but save time during repair.
- Brands like Yodoit and Fixez often offer kits with tools included—budget-friendly and beginner-ready.
- Be sure to check compatibility by matching screen model numbers with your device’s exact variant.
If you’re shopping smart, you can definitely score a good-quality module that fits both your phone model and your budget.
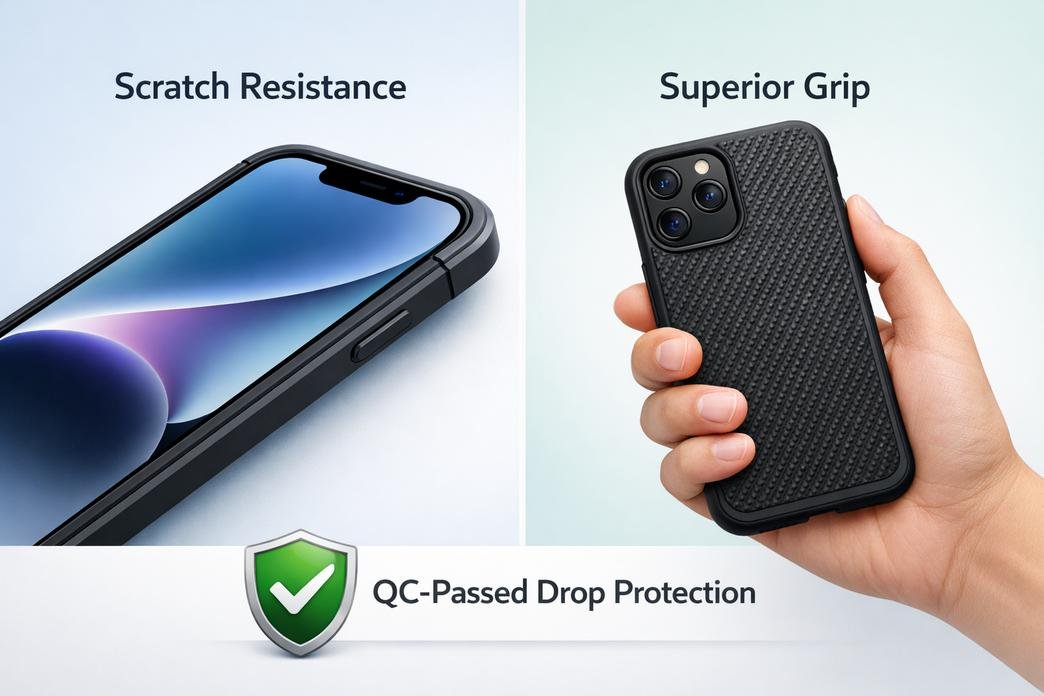
Sourcing Scratch-Resistant Displays on a Tight Budget
You want a durable replacement, not something that scratches if you breathe on it wrong. Here’s how to hunt down tough-as-nails yet affordable options when trying to replace iPhone screen components.
✔️ Look for displays made with hardened glass or advertised as “9H hardness” — many budget-friendly vendors now include this in their specs.
✔️ Cross-reference product reviews that mention long-term use or resistance against keys/pocket wear.
✔️ Pair your new screen with high-transparency tempered glass—many sellers bundle them together at no extra cost.
🗨️ According to IDC’s Q1 2024 Mobile Parts Insight Report: “Over 68% of value-conscious consumers prioritize scratch resistance over resolution when replacing smartphone screens.”
Some suppliers even offer nano-coated surfaces or oleophobic layers under $50. It’s not just about finding the cheapest part—it’s about getting one that won’t look like it went through a blender after two weeks of use.
Bulk Purchase Discounts: Lowering Cost per Screen
When you’re fixing multiple devices or running a repair gig from home, buying in bulk makes serious sense—especially if you’re targeting the sub-$50 range for each screen replacement part.
Here’s how bulk pricing breaks down across common models:
| Model | Qty Purchased | Avg Price Per Unit | Supplier Type |
|---|---|---|---|
| iPhone 7 | 10+ units | $28 | Direct Importer |
| iPhone SE (2020) | 20+ units | $24 | Local Distributor |
| iPhone XR | 5+ units | $42 | Online Wholesale |
| Mixed Models Pack | 15+ units | Varies ($22–$48) | Refurb Vendor |
Step-by-step guide for slashing costs:
- Contact small-scale wholesalers or B2B suppliers via platforms like Alibaba or DHGate.
- Ask about MOQ discounts—even small orders can qualify if you negotiate well.
- Check if bundled toolkits are included; this adds value without raising unit cost.
- Use platforms like eBay Business Supply or contact local repair shops willing to offload excess inventory at reduced prices.
Brand plug? Sure thing—Screen Stocks has been quietly dominating this space by offering certified refurb modules at prices hovering well below retail norms, especially for repeat buyers who order five or more pieces at once.
So whether you’re fixing up old phones for resale or just want backups ready-to-go, buying in batches is where savings stack up fast.
High Repair Fees? Replace iPhone Screen DIY Way
Skip the overpriced repair shops. If you’re ready to roll up your sleeves, this guide makes it easier to replace iPhone screen components with confidence and precision.
Bypassing Service Centers with Original Grade Screens
• Tired of being overcharged? Using original grade screens can sidestep those inflated service center fees without compromising quality.
• These screens match factory specs—resolution, brightness, and color depth—so you’re not downgrading.
• You’ll need a proper toolkit, patience, and a clean workspace to avoid dust sneaking under the glass.
- Identify your iPhone model using its Settings > About section.
- Order an original grade screen that matches your model number exactly.
- Use online teardown guides or videos specific to your model for disassembly tips.
💡 Pro Tip: Keep screws organized by size and location—they’re not interchangeable!
Choosing DIY doesn’t mean going cheap—it means being smart with how you replace iPhone screen parts while keeping performance on point.
Flex Cable Mastery: DIY Solder Point Connections
To get crisp touch response post-repair, your soldering game needs to be tight when working with the flex cable.
Steps:
- Preheat your soldering iron; 350°C is ideal for delicate electronics.
- Carefully strip the end of the replacement flex cable.
- Align it precisely over the original board’s solder points, using tweezers if needed.
- Apply flux before soldering for cleaner joints and stronger conductivity.
- Test continuity after each connection using a multimeter—don’t skip this!
- Reattach display temporarily and check responsiveness before sealing everything back up.
A shaky hand here could mean ghost touches or dead zones later—so take breaks if needed!
Layering Polarizer Film Sheets for Scratch-Resistant Displays
Here’s where you add some real-world durability back into your screen setup using polarizer film layers:
Grouped Tips:
- 🛠️ Clean Room Conditions: Dust-free environments prevent bubbles under film layers.
- 🔍 Precision Cutting Tools: Trimming films slightly smaller than screen edges avoids peeling later.
- 🧼 Alcohol Wipe Prep: Remove oils before applying any adhesive-backed scratch-resistant layer.
- 📏 Layer Thickness Matters:
- Too thin = little protection
- Too thick = reduced brightness
Apply one layer at a time using a soft roller tool or credit card wrapped in microfiber cloth—this helps eliminate air pockets as you go.
The right layering technique protects your new display investment from keys, coins, or whatever else lives in your pocket.
Quick QC of Touch Response and Color Distortion
Before calling it done, run through these fast checks to ensure quality control isn’t an afterthought:
| Test Type | What To Look For | Tool Needed | Pass Criteria |
|---|---|---|---|
| Touch Grid Test | Dead zones / unresponsive areas | Native test apps | Full grid responds |
| Color Accuracy | Washed-out hues / tint shifts | White background image | Natural white balance |
| Brightness Uniformity | Uneven lighting | Black screen + flashlight test | No hot/cold spots |
| Ghost Touch Check | Phantom taps/swipes | Notes app scroll | Smooth scroll only on input |
If anything feels off—even slightly—reopen it while it’s fresh in mind rather than regretting later when you’re halfway through texting someone important.
Using this checklist ensures that every time you set out to replace iPhone screen, you leave no room for second guesses or sloppy finishes.
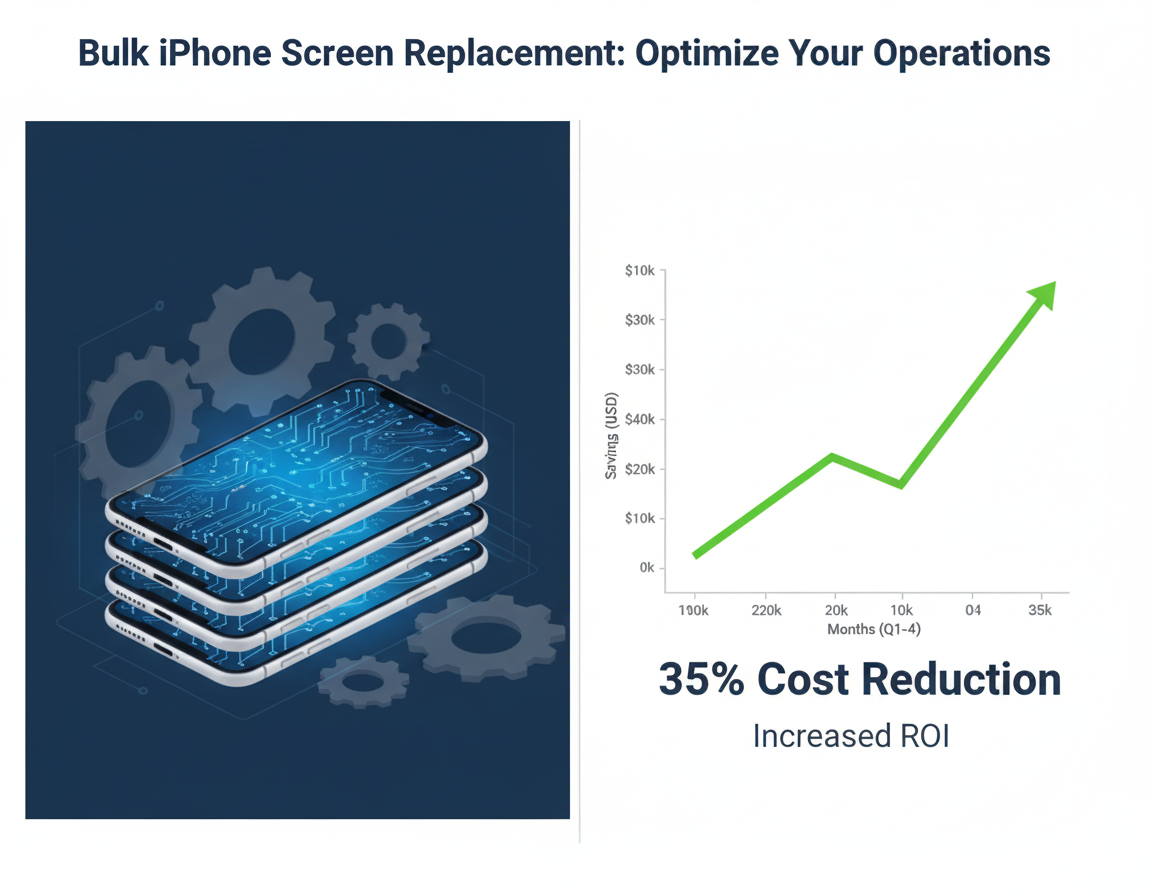
Wholesale Buyers: Replace iPhone Screen In Bulk
Bulk buyers looking to replace iPhone screen units at scale face unique logistical, technical, and pricing hurdles—this guide tackles them all with practical insights.

Price Alerts: Tracking High-Volume OLED Display Panel Discounts
Staying on top of price drops for high-volume OLED display panel orders can mean the difference between a razor-thin margin and a profitable resale cycle.
• Sign up for supplier-specific price alerts that update daily—especially those tied to seasonal inventory clearances
• Use digital dashboards that track historical pricing trends on popular models like the iPhone 12 and 13
• Build relationships with upstream vendors who offer early access to surplus batches
→ Volume-based discounts tend to spike during Q4 due to consumer demand; plan purchases accordingly
→ Don’t ignore smaller regional suppliers—they often offer better deals than large marketplaces
A smart buyer knows how to ride the wave of market fluctuations without getting burned by stockpiling outdated parts.
Choosing Bulk Screen Packaging to Prevent Shipping Damage
When you’re moving hundreds or thousands of units, even a small packaging flaw can lead to massive losses in transit.
🛡️ Choose foam-injected trays for delicate bulk screen shipments—they absorb shocks better than bubble wrap
📦 Double-wall corrugated boxes are non-negotiable for overseas freight
🔄 Request anti-static sleeves when shipping OLEDs; static buildup ruins pixel integrity
Grouped packaging tips:
- For domestic shipping under 500 units: Use stackable plastic bins with inner dividers
- For international freight over 1000 units: Palletize boxes using corner protectors and shrink wrap
- For refurbished screens with glass backs: Add silica gel packs inside each box
Protecting your goods isn’t just about saving money—it’s about preserving trust with downstream repair partners.
Evaluating 6.7 inch vs 6.1 inch Modules for Your Inventory
Choosing between 6.7 inch modules and their 6.1 inch module counterparts isn’t just about size—it’s about what sells faster and breaks more often.
Step-by-step evaluation:
1️⃣ Start by reviewing your last six months’ sales reports—how many screens per model did you move?
2️⃣ Cross-check customer repair requests—Pro Max models usually have higher drop rates due to weight
3️⃣ Factor in storage space; larger displays take up more room, which adds cost per square foot
4️⃣ Consider compatibility across generations—many users upgrade within similar size brackets
5️⃣ Review return rates; larger screens are more prone to edge damage during transport
Most wholesalers find that keeping a balanced mix helps buffer against sudden shifts in model popularity after new releases hit the market.
Integrating Bulk Ribbon Cable Assemblies into Assembly Lines
If you’re replacing hundreds of screens per day, integrating pre-bundled bulk ribbon cable assemblies can seriously cut down on wasted labor time.
Here’s how different setups benefit from integration:
• Automated assembly lines benefit from labeled ribbon kits that reduce installation errors by up to 30%
• Manual repair stations should use color-coded cables grouped by model series (e.g., iPhone X–XS vs iPhone 11–13)
• Mid-sized refurbishers often prefer magnetic trays holding pre-connected ribbons for fast swaps
To boost efficiency:
→ Store cables near workstations using vertical hanging racks
→ Train technicians on connector fragility—ribbon damage is one of the top causes of failed repairs
By embedding these components directly into your workflow, you’ll notice smoother operations—and fewer headaches when trying to quickly replace iPhone screen parts at volume.
FAQs about Replace iPhone Screen
How can I avoid screen damage when shipping bulk orders?
Shipping fragile screens in large quantities feels like walking a tightrope. One sudden jolt, and hundreds of dollars could vanish into cracked glass. To stay ahead of disaster:
- Use foam-lined boxes that cradle each display like it’s the last one on Earth.
- Wrap every screen with a protective film to stop scratches before they start.
- Separate units inside the box—no crowding allowed.
What’s an efficient way to replace iPhone screens at scale?
Speed matters, but precision is non-negotiable. A smart setup includes pre-attached ribbon cables and ZIF connectors ready to snap into place without fumbling or forcing anything. This method doesn’t just save time—it saves nerves.
Which iPhone display sizes are most in demand for wholesale buyers?Some sizes move faster than others because they’re tied to popular models:
- 6.1-inch displays cover multiple generations—think reliability meets volume.
- 6.7-inch options cater to premium devices where profit margins stretch wider.
- 5.4-inch OLEDs serve niche markets but keep your inventory complete.
Can I get scratch-resistant replacement screens under $50?Absolutely—but timing and quantity matter more than luck here:
- Bulk deals often unlock prices below $50 per unit.
- Look for aftermarket suppliers offering tempered glass or coated panels built for durability.
How do I check quality before reselling replacement screens?You don’t want returns haunting you later, so test thoroughly:Run touch response tests across all corners—not just the center—and light up a white background to spot dead pixels hiding in plain sight. Compare color accuracy against OEM standards; even subtle shifts can signal deeper issues beneath the surface.
Why does anti-static packaging make such a difference during storage and transport?It might seem minor until static zaps your entire shipment into uselessness—especially those delicate flex cables waiting silently inside every screen assembly bagged without protection. Anti-static materials act like invisible shields, keeping unseen forces from ruining what looks perfect on arrival but fails hours later under real use conditions.


Recent Comments