One tiny spark and your iPhone battery replacement dream can explode—grab quality parts before your DIY masterpiece turns into smoke.
An iPhone battery replacement looks easy on YouTube, but one slipped screwdriver or bargain-bin cell can turn your phone into an expensive paperweight.
DIYers dive in to save a few bucks, only to crack a screen, strip a pentalobe screw, or trigger that dreaded battery warning.
Apple’s 2025 support documentation states that lithium‑ion batteries require certified tools and proper handling to prevent damage and safety risks during any repair attempt today.
Key Points: iPhone Battery Replacement
➔ Maintain an ESD-safe, temperature-controlled workspace before starting.
➔ Organize Pentalobe, Tri-point drivers, spudger, suction cup and tweezers.
➔ Verify OEM specifications, firmware compatibility and genuine certifications.
➔ Follow step-by-step opening: remove screws, lift screen, handle flex cables.
➔ Post-repair testing: check internal resistance, charging efficiency and safety protections.
How To Prep Your Workspace Before Repair
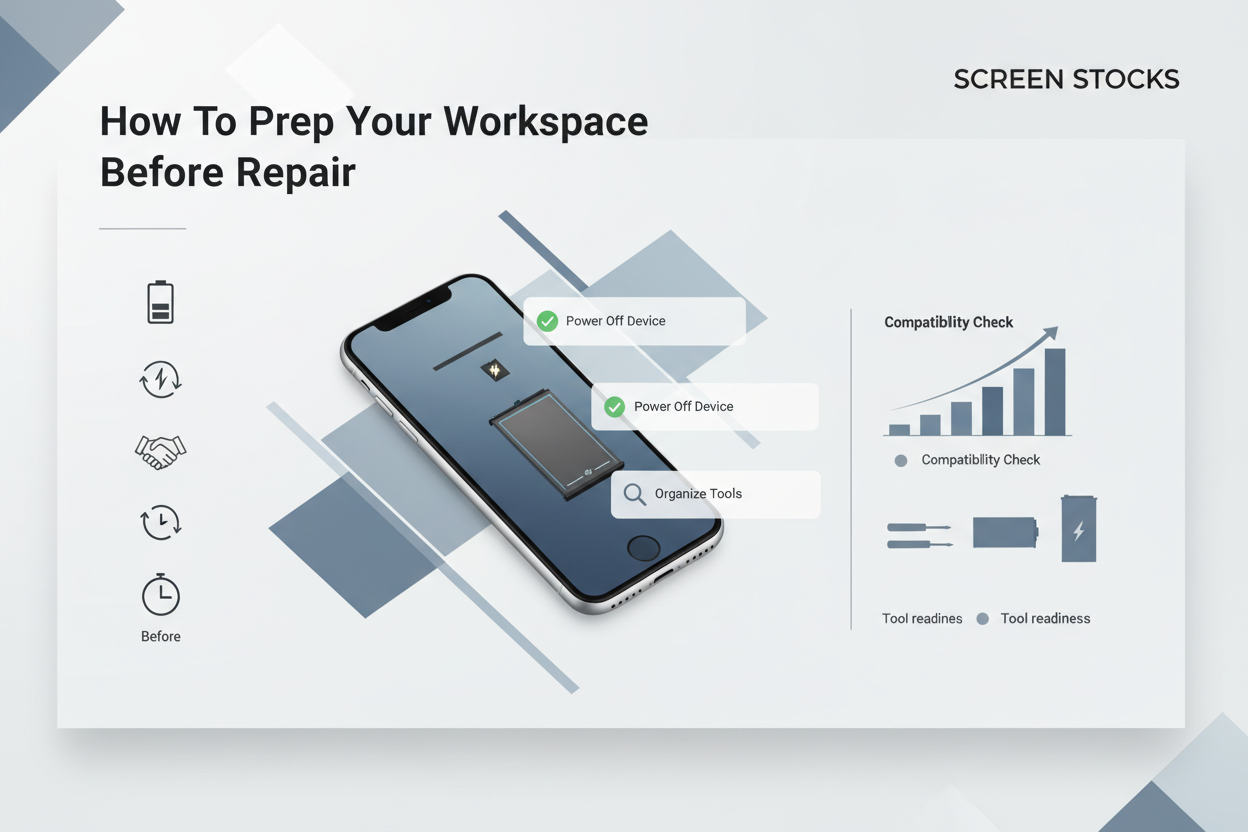
Getting ready for an iPhone battery replacement isn’t just about tools. A clean setup keeps your iPhone, battery, and internal parts safe. If you want smooth iPhone repair results, prep your space right before any battery replacement begins.
Ensuring Temperature Control and ESD-Safe Surface
A stable environment protects every device during iPhone battery replacement. Heat and static are silent troublemakers.
Work Area Climate
Maintain temperature between 18–24°C
Avoid direct airflow from heaters or vents
Keep humidity moderate to limit static buildup
Surface Protection
Use an anti-static mat on your workbench
Connect the mat to proper ground
Test grounding before opening the iPhone
Personal Grounding
Wear a grounded wrist strap
Prevent electrostatic discharge during battery replacement
Stay connected until reassembly is complete
Small detail, big payoff. During an iPhone battery swap, uncontrolled static can damage a tiny component in seconds.
Organizing Pentalobe and Tri-point Screwdrivers
Tool chaos slows down every iPhone battery replacement. Keep it tight.
Identify the Correct Tool
Match pentalobe screwdriver to bottom screws
Use correct tri-point size for internal brackets
Confirm compatible bit set for your model
Structured Tool Layout
Place each tool in order of removal
Separate magnetic from non-magnetic drivers
Label trays for screw organization
Damage Prevention
Avoid worn screwdriver tips
Apply steady pressure
Never force a stripped head
At Screen Stocks, techs keep every screwdriver set calibrated so your iPhone battery repair stays clean and screw threads remain intact.
Verifying OEM Specification and Firmware Compatibility
Before starting an iPhone battery replacement, confirm the OEM specification, correct firmware version, and full compatibility between component and device. A mismatch may trigger battery warnings after installation.
Battery Compatibility Reference
| Model | OEM Capacity (mAh) | Supported iOS Version | Firmware Match Required |
|---|---|---|---|
| iPhone 12 | 2815 | iOS 17–18 | Yes |
| iPhone 13 | 3227 | iOS 17–18 | Yes |
| iPhone 14 | 3279 | iOS 17–18 | Yes |
Follow this quick path:
Check part number against specification sheet
Confirm software version installed
Validate battery compatibility chip
Install and test diagnostics
Screen Stocks supplies OEM-grade parts aligned with current firmware standards, reducing post-repair alerts. When doing an iPhone battery replacement or full battery change, tight compatibility keeps your iPhone running smooth, no surprise messages popping up later.
5 Tools Every iPhone Battery Replacement Needs
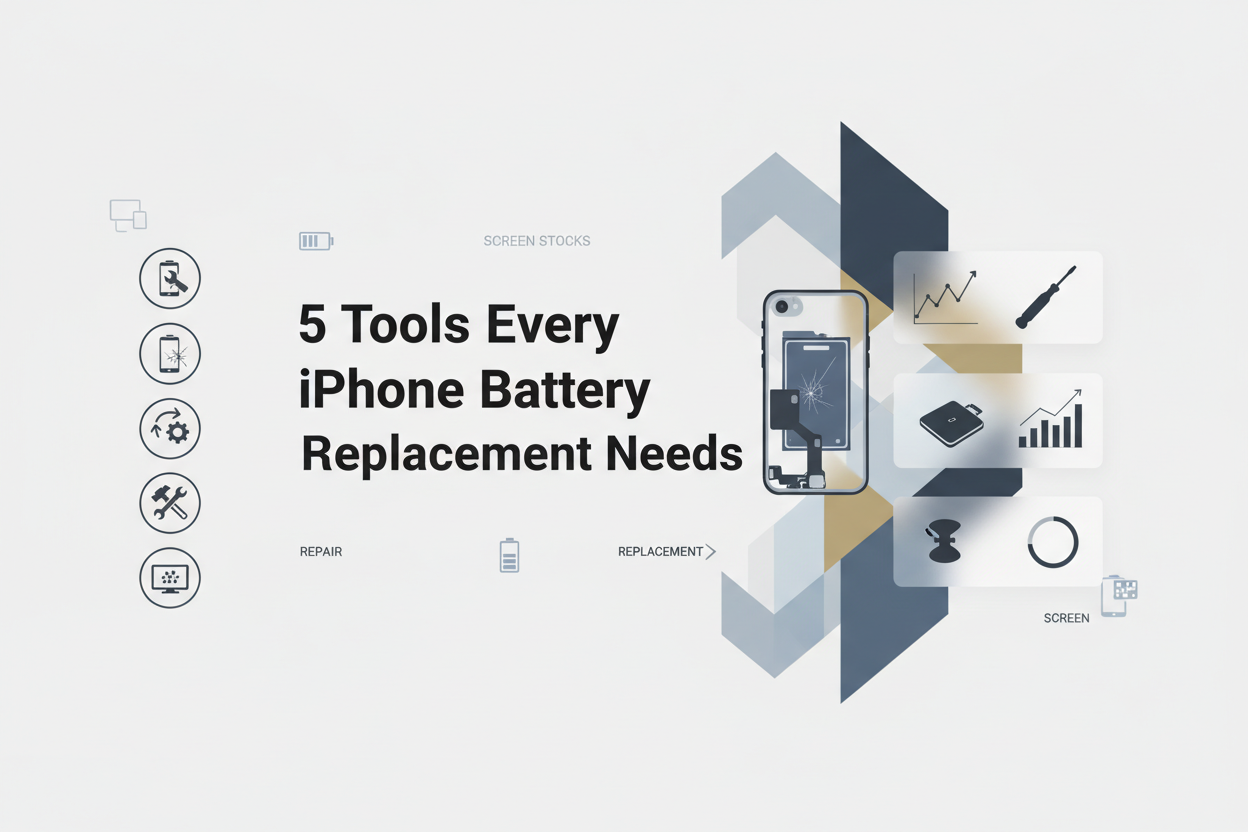
An iPhone battery replacement is not just about swapping a cell. It’s about using the right gear so your iPhone, your battery, and every tiny connector stay safe. If you’re handling an iPhone battery repair at home or in-store, these tools make the job smooth and stress‑free.
Pentalobe Screwdriver
When starting an iPhone battery replacement, the right tool matters more than people think. The star-shaped pentalobe screwdriver is built for the tiny bottom screw on every modern iPhone.
Designed for precision fastener control
Prevents stripped heads during device opening
Keeps your repair clean and professional
In a typical iPhone battery repair workflow:
Inspect the outer screw heads.
Align the star-shaped tip carefully.
Apply steady pressure while turning.
| Screw Type | Head Shape | Typical Torque (N·m) |
|---|---|---|
| Pentalobe | Star | 0.4–0.5 |
| Phillips | Cross | 0.3–0.6 |
| Tri-point | Y-shape | 0.2–0.4 |
A 2025 IDC report noted that device longevity is increasingly tied to “quality third‑party repair ecosystems.”
IDC’s 2025 European Device Sustainability Review observed that consumers are extending smartphone life cycles past 3.5 years, driven by affordable battery servicing and trusted repair suppliers.
That’s where Screen Stocks supports pros and DIY users with reliable screwdriver kits built for repeat iPhone battery replacement jobs.
Plastic Spudger
During an iPhone battery replacement, disconnecting the battery safely is critical. A plastic, non-conductive spudger reduces short risk while prying delicate parts.
Inside the phone:
The battery connector sits near fragile circuits.
Flex cables link display and logic board.
One slip with metal can short the board.
Use it like this:
Slide the plastic tool under the connector edge.
Lift gently—no twisting.
Move to adjacent cables only after power is isolated.
For iPhone battery repair techs ordering from Screen Stocks, high‑grade spudgers hold shape even after dozens of battery replacement cycles.
Suction Cup
Opening the screen without cracking the glass is half the battle in an iPhone battery replacement.
◎ Attach the suction cup near the lower edge.
◎ Apply steady upward force for safe lifting.
◎ Create a slim gap for controlled removal.
The display separates just enough for internal access. Slow and steady keeps cables intact. In any battery swap, protecting the screen saves serious cash.
Tweezers (ESD safe)
Tiny screws. Micro cable ends. Slim metal brackets. This is where precision matters.
In an iPhone battery repair bench setup:
Use ESD-rated tweezers for small parts.
Anti-static coating shields logic board.
Fine tips improve handling of fragile connector pins.
Store screws by size.
Bottom case
Shield plate
Battery bracket
Clean handling reduces lost hardware and speeds up repeat iPhone battery replacement jobs.
Adhesive Strips
An iPhone battery replacement isn’t complete without fresh adhesive strips. Old glue stretches, snaps, and complicates future service.
For secure battery securing:
Remove leftover double-sided tape.
Align new mounting strips within the frame.
Press evenly before reconnecting.
Good replacement adhesive keeps thickness consistent and simplifies the next battery swap. Shops sourcing through Screen Stocks often prefer pre-cut adhesive sized exactly for each iPhone model, making every iPhone battery replacement quicker and cleaner.
How To Identify A Fake Replacement Battery
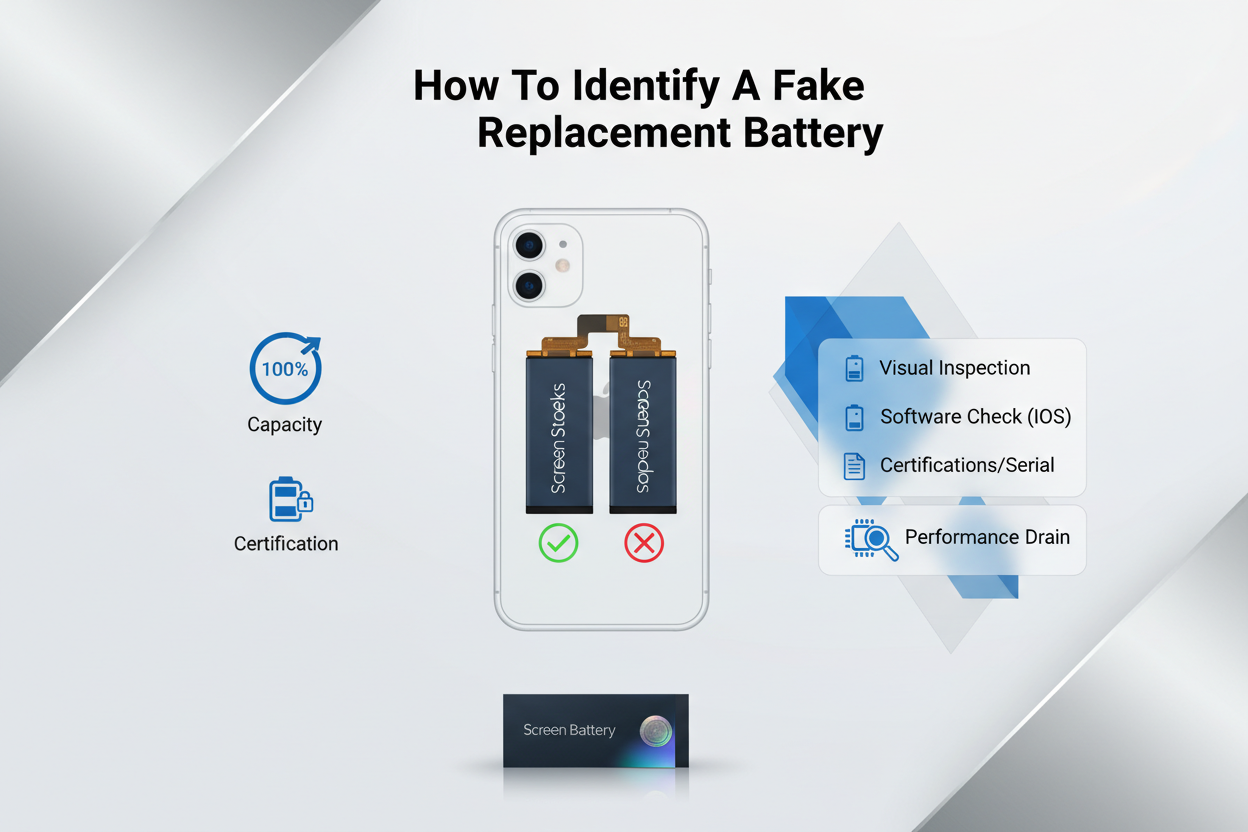
Buying an iPhone battery replacement sounds simple, but the market is messy. Fake cells sneak in everywhere. If you’re planning an iPhone battery repair or full iPhone battery change, these checks matter.
Checking Capacity (mAh) and Voltage (V) Ratings
When evaluating an iPhone battery replacement, always verify the labeled Capacity, mAh, Voltage, V, and overall Rating against the original Specification.
Compare Core Power Data
Battery Capacity (mAh) must align with Apple’s OEM rating.
Voltage (V) should typically read 3.81V or model-specific equivalent.
Inflated Power claims are a red flag.
Cross-Check Energy Consistency
| Model | OEM Capacity (mAh) | Rated Voltage (V) | Expected Energy (Wh) |
|---|---|---|---|
| iPhone 12 | 2815 | 3.83 | 10.78 |
| iPhone 13 | 3227 | 3.83 | 12.41 |
| iPhone 14 | 3279 | 3.85 | 12.68 |
| iPhone 15 | 3349 | 3.87 | 12.96 |
Performance Signals
Rapid drain after an iPhone battery replacement
Phone heating during charging
Battery health dropping fast
If the numbers feel off, skip it. Reliable suppliers like Screen Stocks clearly list precise Specification sheets for every Battery model.
Verifying RoHS Compliance and CE Certification
A legit iPhone battery replacement must meet RoHS, Compliance, CE, and safety Standard requirements.
Certification Inspection
Clear CE Certification logo
Traceable manufacturing code
Verified hazardous substance Regulation statement
Safety & Quality Breakdown
RoHS Compliance limits lead and mercury.
Proper Certification ensures thermal protection circuits.
Missing marks usually mean poor Quality control.
Quick Verification Path
Check print clarity.
Confirm serial traceability.
Compare packaging with OEM examples.
No markings? Walk away. An iPhone battery change shouldn’t risk device safety.
Inspecting Flex Cable Length and Casing Material
Physical inspection matters just as much as numbers.
Component-Level Review
Flex cable Length must match the original layout.
Connector alignment affects internal Design.
Weak solder points signal poor Inspection standards.
Casing & Material Quality
Strong aluminum-laminate Casing
Even surface finish
Proper Material thickness
Layered Structural Check
Outer Shell
Scratch resistance
No swelling
Internal Cell
Balanced weight
Stable internal Component build
A real iPhone battery replacement feels solid, not flimsy. When sourcing for bulk iPhone battery repair jobs, Screen Stocks maintains tight Quality checks so your iPhone battery replacement doesn’t turn into a callback headache.
STEP-BY-STEP: Opening Your iPhone Without Damage
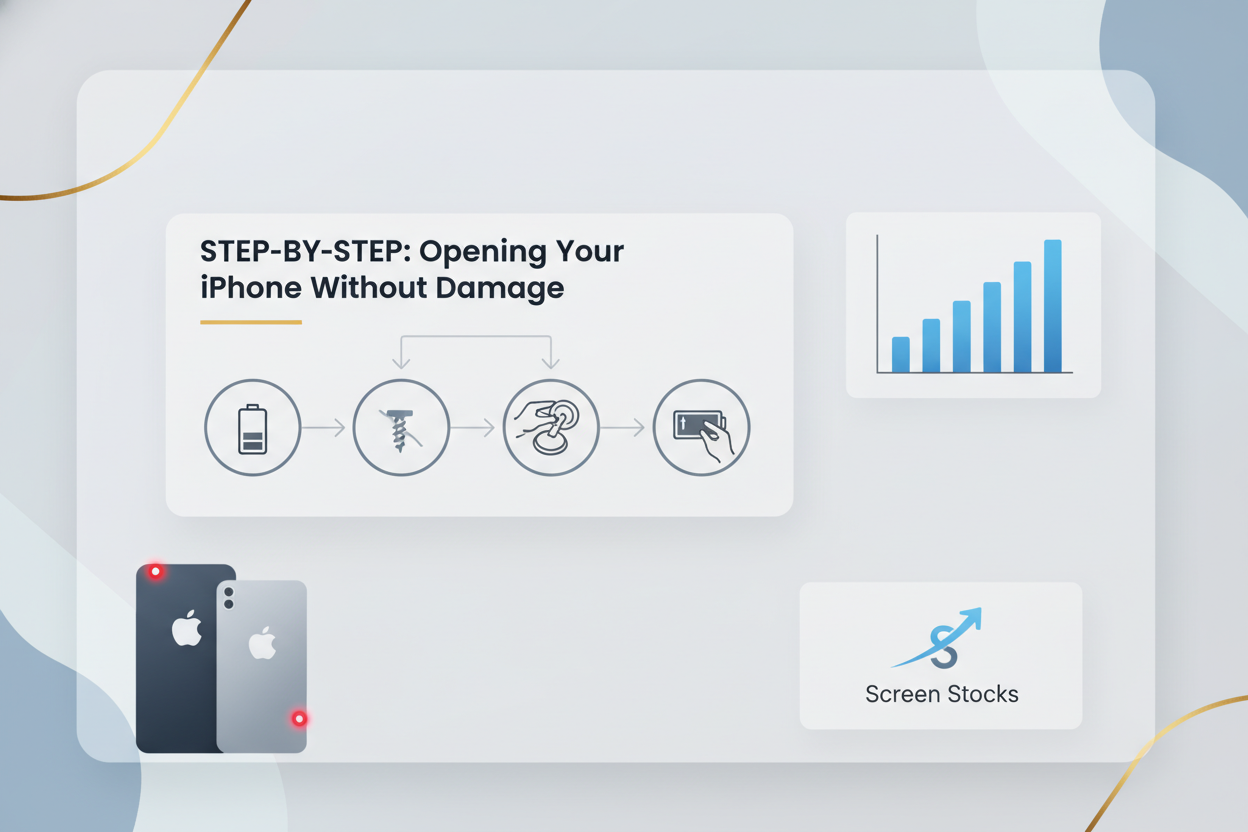
Opening your phone the right way saves cash and stress, especially before an iPhone battery replacement. If you’re planning an iPhone battery swap or full iPhone repair, careful entry keeps your device safe. A clean open means smoother iPhone battery replacement results later.
Removing Screws with Pentalobe and Tri-point Screwdrivers
Before any iPhone battery replacement, deal with the outer screws and internal fasteners properly.
Tool match matters:
Use the correct pentalobe screwdrivers for bottom screws.
Switch to tri-point drivers for internal brackets.
Screw handling routine:
1) Loosen with steady downward pressure.
2) Turn slowly to prevent stripping.
3) Place each screw in labeled spots.
Inside layout for battery service:
Bottom edge
- ◦ Two pentalobe screws
Display shield
◦ Tri-point fasteners
◦ Metal bracket screws
Mixing screws can ruin threads. During an iPhone battery replacement, even tiny alignment errors cause gaps after reassembly. Screen Stocks toolkits include precision drivers sized for smooth removal and clean reinstallation.
Applying Suction Cup for Screen Separation
Clean the screen surface before placing the suction cup.
Press firmly near the lower edge.
Lift gently to start separation.
Slide a thin opening tool once adhesive loosens.
If resistance feels extreme, pause. Warm air can soften adhesive without warping the display.
For iPhone battery repair jobs, controlled screen separation protects the flex area. Rushing here risks cracked glass and extra cost. Screen Stocks provides high-grip suction tools that make iPhone battery replacement prep feel less nerve‑racking.
Using Metal Prying Tool to Lift the Form Factor Edges
After initial opening, guide the metal prying tool along the edges of the enclosure.
Edge navigation:
Left chassis rail
Insert shallow
Glide, don’t stab
Right side
- Avoid button flex zones
Depth control is key.
Keep entry under 3 mm.
Avoid exposed circuitry.
Swap to a spudger near delicate zones.
During an iPhone battery replacement, bending the frame affects sealing and battery seating. Clean lifting preserves the original form factor and keeps the phone looking factory-fresh.
Handling Flex Cable Carefully with ESD-Safe Tweezers
Now focus on the flex cable area tied to the connector cluster.
Preparation for iPhone battery replacement:
Disconnect power source.
Ground yourself to reduce static discharge.
Use ESD-safe tweezers for small brackets.
Connector layout:
Battery ribbon cable
- Lift vertically
Display ribbon cable
- Support board beneath
Sensor cables
- Avoid twisting
A torn ribbon cable turns a simple iPhone battery replacement into a full display repair. Handle these delicate components like glass. With careful handling—and quality parts from Screen Stocks—your iPhone battery replacement stays smooth and drama-free.
Post-Repair Testing: Battery Drain Checklist
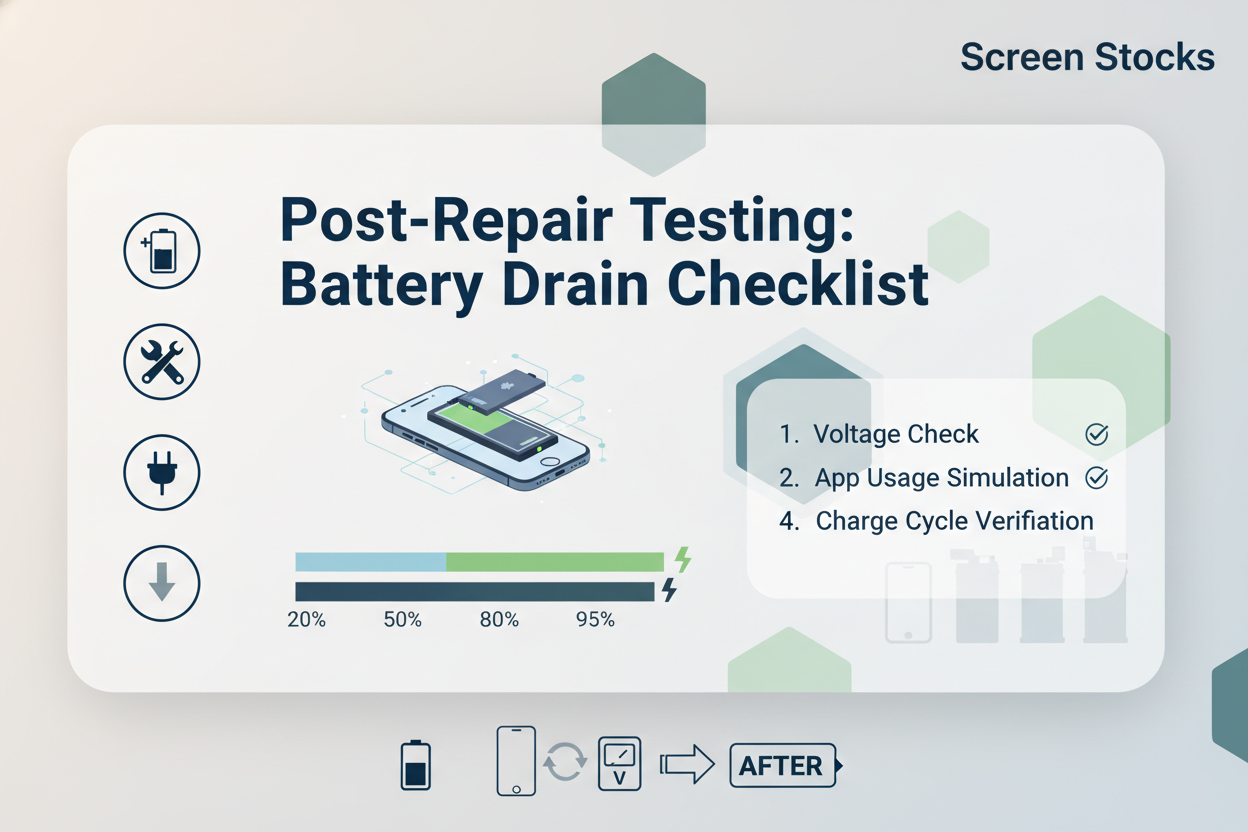
After any iPhone battery replacement, testing is not just a quick power-on check. It’s about real numbers, steady output, and long-term stability. A proper iPhone battery replacement should restore smooth daily use, not create new headaches.
Measuring Internal Resistance and Discharge Rate
After an iPhone battery replacement, start with hard data:
Internal Diagnostics
Measure internal resistance using a calibrated measurement tool.
0–80 mΩ: Normal impedance
80–120 mΩ: Mild wear
120+ mΩ: Potential defect
Load Testing
Apply controlled current draw.
Record real-time voltage drop.
Compare rated vs actual capacity.
Discharge Monitoring
Track discharge rate at 20%, 50%, and 80% load.
Note abnormal heat or unstable battery output.
| Load (%) | Current (A) | Voltage (V) | Discharge Rate (%/hr) |
|---|---|---|---|
| 20 | 0.6 | 4.18 | 4 |
| 50 | 1.2 | 4.05 | 8 |
| 80 | 1.8 | 3.92 | 14 |
| 100 | 2.2 | 3.85 | 18 |
If numbers drift fast, that iPhone battery replacement needs a second look.
Monitoring Charging Efficiency over Multiple Cycles
Charging tells the real story. After iPhone battery replacement, run at least five full battery cycle tests.
Check charging time from 20% to 80%.
Log efficiency by comparing input energy and stored power.
Watch for sudden degradation.
Short notes help:
Stable voltage curve = healthy install.
Minimal heat = balanced monitoring result.
Capacity above 95% after cycles = solid lifespan outlook.
Professional suppliers like Screen Stocks test each iPhone battery before shipping, reducing early-cycle drop-off. That matters for anyone offering iPhone battery repair services.
Verifying Overcharge Protection and Short-circuit Protection
Run safety validation in sequence:
Charge to 100% and confirm overcharge cutoff triggers at safe voltage.
Simulate high current draw to confirm protection logic.
Introduce controlled short circuit simulation using a protected circuit board tester.
Confirm automatic fault response and reset behavior.
A proper iPhone battery replacement must pass all four. No shortcuts here.
Assessing Performance Consistency and Expected Cycle Count
Long-term health defines battery value.
Cycle Tracking
Record projected cycle count (500+ typical).
Compare actual capacity retention every 50 cycles.
Performance Stability
Monitor daily voltage stability.
Evaluate consistency during heavy apps and standby.
Battery Health Indicators
Internal analytics for battery health percentage.
Watch long-term degradation trends.
A dependable iPhone battery replacement should keep performance steady, not just on day one, but months down the road. That’s the difference between a quick swap and a repair done right.
FAQs about Iphone Battery Replacement
How should I prepare my workspace for an iPhone battery replacement?
A calm, organized bench prevents costly mistakes during an iPhone battery replacement.
Set stable temperature control to reduce overheating risk and protect battery energy density.
Use an ESD mat and grounding strap to guard internal circuits and maintain manufacturing tolerance.
Arrange tools neatly:
Pentalobe Screwdriver
Tri-point Screwdriver
Plastic Spudger
Suction Cup
Tweezers (ESD safe)
Small habits protect durability, reduce defect rate, and keep connectors aligned with the original form factor.
What tools and components are essential for safe battery removal?
An iPhone battery replacement becomes risky without the right kit. Precision keeps the display and board safe.
Key repair components:
Suction Cup → lifts the screen without stressing the flex cable length
Plastic Spudger → disconnects the connector type gently
Adhesive Strips → secure correct positioning and thickness
Metal Prying Tool (used carefully) → separates tight casing material
Good tools protect physical traits like dimensions (size) and weight balance, preventing frame distortion and preserving device compatibility.
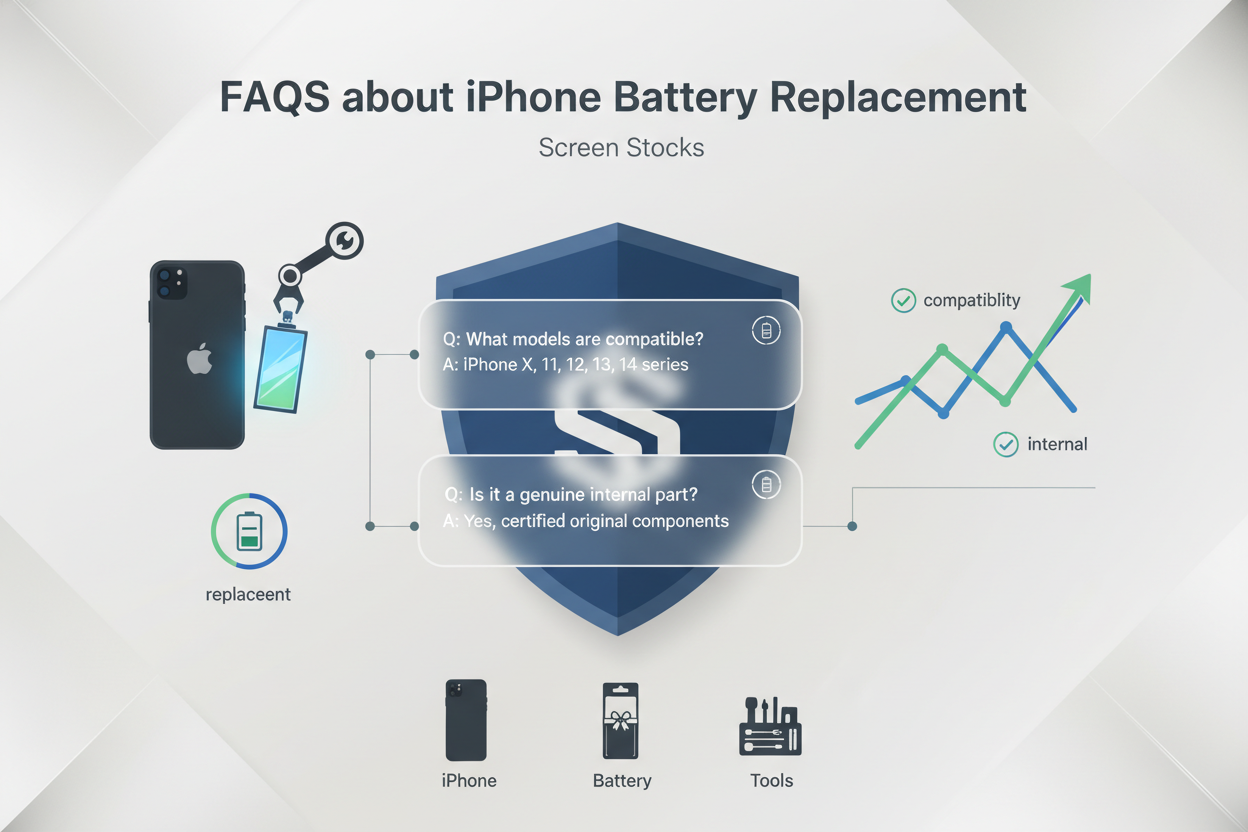
How can I verify that a replacement battery is genuine and compatible?
Trust comes from measurable data, not packaging claims.
Check compatibility and performance in layers:
• Confirm iPhone model, part number, and firmware compatibility
• Match capacity (mAh) and voltage (V) with OEM specification
• Inspect physical details: thickness, connector type, flex cable length
• Compare internal resistance and expected cycle count
Then review compliance:
RoHS Compliance
CE Certification
UN38.3 Standard
MSDS Document
Accurate alignment between aftermarket standard and OEM specification ensures reliability and longer lifespan.
What signs show the battery is functioning correctly after replacement?
After an iPhone battery replacement, performance should feel steady and predictable.
A healthy battery shows:
Stable discharge rate under daily use
Smooth charging efficiency without sudden drops
Controlled heat due to overheating protection and voltage regulation
Active overcharge protection and short-circuit protection
Performance consistency over several cycles reflects low internal resistance and strong material quality. When charging feels calm and battery percentage moves naturally, the repair has truly succeeded.