

Maintaining Your Device After Apple iPhone Cracked Screen Repair Near Me
If you searched apple iphone cracked screen repair near me because a company phone just came back with fresh glass, the real work starts at the counter: inspect the device before you leave, watch how it behaves while you use it normally, and keep the invoice and written warranty terms where you can find them months later. Check, observe, document — in that order. Those three steps keep a repaired phone in service and keep you in a position to raise a problem without arguing about what happened.
Almost everything specific varies. How a repair was done, what part went in, whether any warranty or insurance you hold is affected, how the phone should be treated around liquid afterward, what the work cost, and what a shop does with your data depend on the device model, the provider, your insurer or plan, and where you live. Nothing here overrides the paperwork you were given, the documentation that came with the phone, or the terms of any plan or warranty you hold. Where written terms and general guidance disagree, the written terms win.
The sections below follow the order these decisions actually arrive: the counter inspection, the first days of normal use, the habits that protect a repaired display, the paperwork worth keeping, how to evaluate a local provider and compare repair paths, what changes when several company phones are involved, and how to decide when the phone should go back.
What to Check Before You Leave the Repair Counter
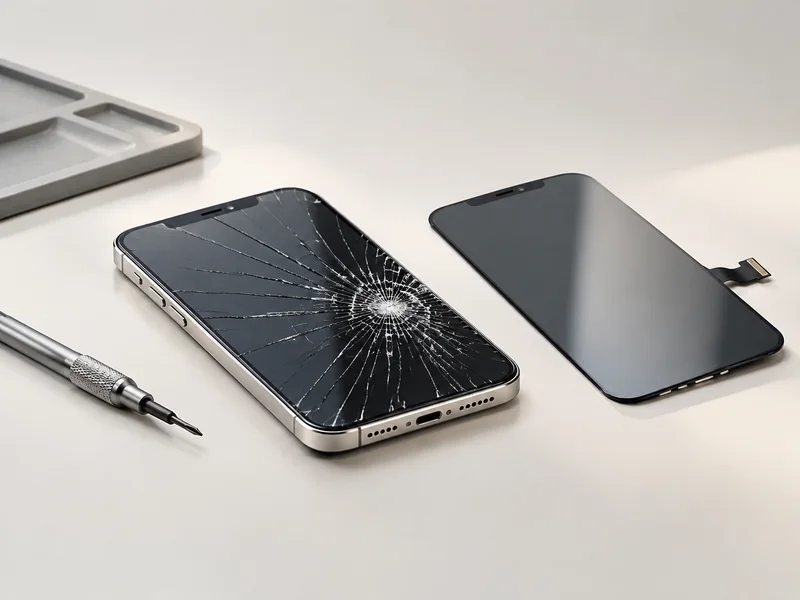
Run the inspection at the counter, in this order: display first, then every input, then the features you use daily, then charging, then physical fit — and do not pay or walk out until anything that looks off is written down on the same visit. The order matters because the counter is the only moment when the people who did the work are standing in front of you and can see the same thing you see. A problem spotted there is a conversation about a redo. A problem spotted at home two days later is a scheduling conversation, and the cause is suddenly arguable.
Work through it as a sequence:
- Check the display on a plain background, in two lighting conditions. Open a blank note or a solid-color image, look at it at low brightness and again at high brightness, and check for patches, uneven tinting, bright or dark spots, or lines that show up at only one brightness level. If something looks wrong, say: “There is a patch here that is not consistent across the screen — can we look at it together before I pay?”
- Tilt the phone and look across the surface at a shallow angle. Reflections reveal what a straight-on look hides: lifting at the edges, a bulge, or a ripple under the glass. Point it out while the provider is still holding the invoice: “The top edge looks like it is lifting — can you check the fit?”
- Sweep touch response across the whole surface. Drag a finger in slow horizontal and vertical lines that reach every corner and edge, not just the middle. Then open a keyboard and type, and open a drawing or note app and draw continuous lines. Touch response is the part you notice every day, and corner or edge dead zones hide from ordinary scrolling. If you find one: “Draw a line here and it breaks in this corner.”
- Exercise the features your model has. If your phone has a display color setting such as True Tone, check that it behaves the way it did before service rather than changing it yourself. If it unlocks with Face ID, confirm it registers the same way it did before. Do the same for the front and rear cameras, the sensor that blanks the screen during a call, the side and volume buttons, and the ringer switch. Describe what you saw — “the camera preview looks hazy” — rather than naming a cause.
- Test charging behavior with your own cable and charger. Confirm the phone charges, watch whether it heats more than you remember during charging, and note any change in how quickly the battery level moves. Charging touches the enclosure, the port, and heat, so it belongs in the counter check rather than in your memory of the drive home. If it looks off: “It heats more than it used to while charging — can you note that?”
- Inspect enclosure fit. Run a fingertip along the seam where the display meets the frame. Look for uneven gaps, a corner that sits proud, a wobble when the phone rests flat on a table, or a screen edge that gives slightly under light pressure. Ask: “There is a gap at this corner — is that within what you would expect?”
- Ask about sealing before you leave. Ask the provider directly what was done about the seal at the edges and how the phone should be treated around liquid from here on. Do not assume the protection the phone had when it was new still applies; that is a question for the provider’s own documentation and the manufacturer’s guidance, not something to settle by guessing.
- Record the handover. Photograph both sides and all four edges, note the date and time, and ask the provider to write down what was replaced or reset and what warranty applies to the work.
Feature availability, resealing practice, and how much detail a shop can share about parts all vary by model and provider — which is why the last step is not optional. Ask, get the answer in writing, and keep it with the invoice.
The First Days After the Repair: How to Get Back to Normal Use

Use the phone close to normally, but keep the way you use it repeatable so you can tell a one-off glitch from a pattern. No universal rest period applies here, and this guide will not invent one. If the provider gave you activity guidance, follow theirs; if they did not, ask before assuming.
Treat the after-repair window as two phases, because they answer different questions.
The Short Window Right After Service
This phase is about comparison. Your memory of the phone before the crack is the baseline, and the useful thing you can do is exercise the functions you remember using: the display, touch input, cameras, speaker, and charging. Deliberately repeat the same few actions — unlock it the same way, take the same kind of photo, play the same track, plug it in the same way.
Start a symptom log in the first hour, not in the moment something goes wrong. A usable entry has five parts: the date and time, what you were doing, which app or feature was involved, what happened, and whether it happened again under the same conditions. That is enough for a technician to act on. “It feels weird sometimes” is not.
What you should not do is diagnose. Telling a panel problem apart from a software, calibration, or assembly problem is not something you can settle from the outside, and the usual habits — resetting settings, reinstalling apps, pressing on the display to test it — add variables instead of removing them. Report and observe, and let the people who did the work interpret it.
The First Week: Watching for Patterns
By the middle of the first week, single events matter less than repetition. Three questions sort it out:
- Does the same symptom return under the same conditions, or did it happen once?
- Is it trending better, flat, or worse than it was on day one?
- Does it line up with something specific — charging, heat, pressure in a pocket, a particular app, a particular orientation?
Three conditions justify contacting the provider rather than waiting another day: a symptom that is new since the repair, a symptom that is getting worse instead of settling, or a symptom that involves a feature which worked before the phone went in.
While you are still evaluating, keep the phone away from water, dust, and high-vibration places such as a bike or machine mount. That is not a statement about what the repair did or did not preserve; it is simply the low-risk choice while the phone is under observation and before you have the provider’s answer about sealing.
Everyday Protection and Care for a Repaired Screen

Protect the phone from the next impact and from small daily pressures, and re-check fit every time you add something to the device. A case and a screen protector mainly reduce the chance that another impact reaches the display, but both can also press on the area that was just repaired, so the fitting check matters as much as the accessory itself.
Run this as a short routine rather than a list of rules.
Handling
- Avoid pressing hard on a single point of the display; thumb pressure spread across the screen is gentler than a jab with one fingertip.
- Keep keys, coins, tools, and cable ends out of the pocket where the phone rides.
- Watch mounts that clamp the frame — car mounts, bike mounts, gym holders — and anything that squeezes the phone inside a bag.
- Set the phone down face-up when you can, on a surface free of grit.
Protection fit
- Fit a case, then look along all four edges for lifting, bubbles, or pressure marks that were not there before.
- Confirm the case does not clamp hard on the frame or rest on the display edges, since that puts force where the display meets the enclosure.
- Choose the protector style deliberately: a thin film-style protector is less noticeable and easier to fit around curved edges; a rigid glass-style protector changes the feel of the surface and can chip along its own edges; matte and privacy finishes change clarity and how fingerprints show. None of these is automatically the better pick — fit, glare, and how the surface feels under your thumb decide it.
- Re-check the same edges a day or two after fitting, because a protector that lifts at a corner usually keeps lifting.
Charging habits
- Use charging gear that is compatible with your phone and in good condition, and check the cable ends for wear.
- Do not rest books, bags, or other weight on the phone while it charges.
- Treat unusual heat or a change in charging behavior as something to report, not something to work around.
- Unplug by the connector body rather than the cable, and if the charging port seems blocked, ask the provider instead of digging into it with anything.
Cleaning the display
- Wipe with a soft, non-abrasive cloth suited to a display; start dry or barely damp, never wet.
- Keep liquids away from the seams, openings, and buttons.
- Skip abrasives, solvents, and household sprays, and follow the manufacturer’s cleaning guidance for your model, since coatings and materials differ.
- Do not use compressed air or sharp objects around the seams and openings.
This is general care guidance only. Displays, coatings, protectors, and cases behave differently, and the manufacturer’s or provider’s instructions for your device govern what you should actually use.
Paperwork to Keep: Receipt, Parts Notes, and Written Warranty Terms
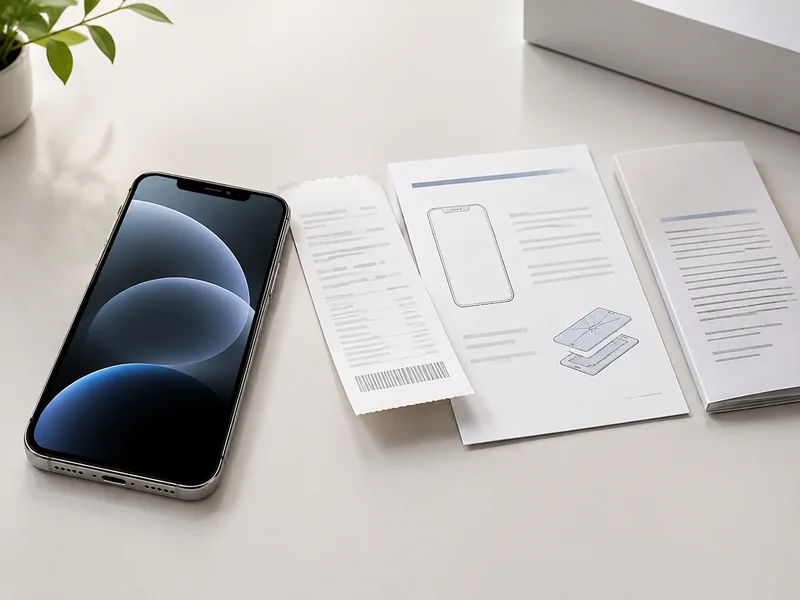
Before the phone leaves the counter, get five things in writing: what was replaced, what you paid, what the warranty covers and for how long, who to contact, and what condition the device was in at handover. That set turns a later problem into a claim instead of a story about what someone remembers saying.
| Document | What it should show | The later situation it protects against |
|---|---|---|
| Itemized invoice or receipt | Service date, device identifier, work performed, amount paid, provider name, and a contact method | Proving what was done, when, and by whom if the same area fails later or the cost needs reimbursement |
| Written warranty terms | What is covered (parts, labor, or both), how long coverage runs, what would end it, and how a claim is started | Deciding whether a return visit is a covered re-repair or a new charge |
| Parts information note | Whatever description the provider is willing to put in writing about what was installed | Having a record to compare against if a symptom later points at the display area |
| Insurance claim record | Claim number, approval document, and the contact for the adjuster or support line | Sorting out coverage and deductible questions, and avoiding a duplicate claim on the same incident |
| Condition photos and notes | Pre-existing scratches, dents, camera condition, plus date and time | Separating old wear from damage that appeared after the repair |
| Asset record entry for company phones | Device identifier, repair date, what was replaced, warranty expiry, and who approved the work | Spotting a repeat failure on the same phone while it is still covered |
Parts information deserves its own note. What a provider will commit to in writing about where a part came from varies, and how much it can disclose can depend on the programs it participates in and the rules that apply where it operates. Ask for as much specificity as the shop will put on paper, then file whatever you get. A short written description still beats a memory.
Insurance adds a parallel paper trail. If a carrier plan or device insurance is covering the work, the claim number and approval document belong in the same folder as the repair invoice, because coverage questions are later settled by matching the two.
Photos take two minutes and resolve a common dispute: whether a scratch, a dent, or a camera problem existed before the phone went in. Shoot both sides, every edge, and a close-up of anything already worn.
File it digitally rather than in a drawer. Name each file with the device identifier and the service date, and put any warranty expiry date somewhere you will actually see it. For a company-issued phone, attach everything to the asset record so the history survives a change of manager, employee, or provider.
Warranty length, what is covered, deductible amounts, and consumer rights vary by provider, insurer, plan, model, and state. This is not legal advice; the written terms you receive govern your situation.
How to Vet a Local Repair Provider and Compare Your Repair Paths

Vet a provider on four things you can verify — a written quote and warranty, a clear statement of what will be installed, a written answer on data handling, and how easy it is to bring the phone back to the same people — and treat ads, map placement, and star ratings as marketing signals rather than evidence of quality. They describe how a business reaches customers, not what happens to your phone or what paperwork you receive afterward.
Questions to Ask Any Provider
Ask these before you hand over the device, and get the answers in writing where you can:
- How does diagnosis work before quoting, and is the quote written?
- What exactly will be installed, is there a choice, and will it appear on the invoice?
- What warranty covers the work, for how long, and how is a claim started?
- Does the shop participate in any manufacturer or insurer program, and what would that change about your parts and warranty paperwork? Ask rather than assume — a provider’s status is something it states, not something you infer from a logo.
- How is the phone handled: does it stay on site, or is it sent somewhere else, and how long is it held?
- Does Find My need to be turned off, and would a passcode be required? What is the shop’s written policy?
- What happens if the phone is not fixed as expected — who is the point of contact, and what is the redo process?
Comparing Repair Paths on Criteria You Can Verify
| Repair path | Downtime exposure | Written warranty and parts documentation | Data-handling questions to ask | Reversibility if a symptom returns | Best fit |
|---|---|---|---|---|---|
| Local walk-in shop | Ask whether the phone is repaired while you wait or stays overnight | Request the quote, warranty terms, and parts description in writing before work starts | Where the phone is kept, who has access, whether Find My must be off | Usually the easiest to revisit — same people, same place, same paperwork | A single business phone that must be back in service fast and stay easy to bring back |
| Mail-in repair | Shipping on both ends plus the repair window, so plan for a longer gap | Ask what is documented and returned with the device, and who is responsible while it is in transit | Which facility receives the device, how long it is held, and the written data policy | Harder, because the device leaves your area and each round trip costs days | Downtime you can schedule, or when no local option meets your criteria |
| Manufacturer-authorized service | Depends on appointment availability, which you confirm yourself | Program participation can change the paperwork you receive, so ask what you would get | Ask how data is handled under that program’s terms | Straightforward while the relationship exists; ask how a later issue is raised | A phone where alignment with a manufacturer program or an existing plan matters most |
| Independent repair shop | Often flexible on timing; confirm the specifics for your device | Written terms vary widely, so ask every question you would ask anywhere | Written policy varies; ask the same questions you would ask anywhere | Usually easy if the shop is local and documents its work | A shop that answers your questions clearly in writing and is convenient to revisit |
| Parts-only route (you or a third party installs) | Depends entirely on who does the work and when | Any coverage follows the parts seller and the installer, so confirm both | You keep the device, which changes the data question but not the risk of an error | Low — a failed attempt can leave you explaining two repairs to a third party | Someone with real repair experience and a clear reason not to use a shop |
| Replacing the device | Depends on procurement, setup, and enrollment of the new phone | No repair warranty applies; device warranty or plan terms do | Data migration becomes the main task, so plan the transfer before the old phone goes back | Not applicable, but any remaining coverage on the repaired unit ends | A phone already failing in several ways, or when repair is not a sensible use of time |
Whichever path you choose, protect yourself before handover. Back up the data you cannot lose. Set the passcode and Find My the way your policy or your own preference requires, use mobile device management protections where they apply, note the device identifier and its condition, and sign out of anything you would not want visible on a device that leaves your hands. Do that regardless of how confident the answers were, because the point is to remove the need to trust an assumption.
What any specific provider can offer depends on its own policies, programs, and location, none of which a general guide can confirm for you. Treat every answer you receive as the thing you are comparing, not the logo on the door.
Managing Repairs Across a Small Fleet of Company-Issued iPhones

Handle cracked screens as a process question rather than an incident, and decide four things before the next phone drops: your downtime model, who can approve a repair versus a replacement, how employee data is separated before handover, and what documentation comes back with every device. Settling these in advance is what keeps a cracked screen from turning into three days of lost work and an argument about who approved what.
Downtime model. Three common approaches, each with a different cost in management overhead:
- A small pool of spare phones kept ready. Trade-off: upfront cost and the ongoing work of keeping spares charged, updated, and enrolled.
- A loaner device arranged per incident. Trade-off: less inventory to maintain, but each incident depends on availability and on someone arranging it under time pressure.
- Temporarily reassigning work so the employee can function without a phone. Trade-off: no hardware to manage, but it only works for roles where the phone is not the primary tool.
Approval threshold. Name who can approve a repair, who can approve a replacement, and what pushes a case from one to the other — for example, a device that has already been repaired in the same area. Setting that line in advance removes the wait while someone decides.
Mobile device management interaction. If company phones run through a mobile device management platform, settle three things: what an employee does before handover, how a loaner is enrolled while the original is away, and who confirms the original is back in service afterward. The platform’s own documentation is the authority on what it can and cannot enforce.
Employee data separation. Before a device leaves the building:
- Back up the data the employee needs.
- Have the employee sign out of the accounts your policy says should be signed out.
- Secure the passcode and Find My settings as the policy requires.
- Apply the mobile device management protections the platform provides.
- Confirm on return that the device is back in service and the employee can work.
Do not assume what a repair provider can or cannot access on a device in its hands. The safer approach is to remove access you do not need to grant and lean on the protections the device and platform give you, rather than on an assumption about someone else’s process.
Documentation standard. Require the same four things back with every repaired device: the invoice, a description of what was replaced, the written warranty terms, and the completion date. File them against the device so repairs read as a device history rather than a pile of receipts. That is what makes a second failure on the same phone visible while it is still under coverage.
Employee-facing instructions. Write them once: where to take a cracked phone, what to do with the device first, who to notify, and what not to do in the meantime. A one-page internal note removes most of the improvisation from the next incident.
What a management platform enforces, and what a provider does with a managed device, depend on the platform, the device model, and the provider’s own written terms. Check both before you rely on either.
When to Take the Repaired iPhone Back to the Provider

Go back whenever a symptom is new since the repair, is getting worse instead of settling, or involves a feature that worked before the phone went in — and go back to the same provider first while the coverage described in your written terms is still open.
The triggers worth acting on:
- A display or touch problem that was not there before the repair.
- A symptom affecting the cameras, the sensor that blanks the screen during a call, the speaker, the buttons, or the front-facing unlock that worked normally before service.
- Anything in your symptom log that repeated under the same conditions.
- A visible physical change: lifting edges, an uneven gap, a bulge, or a screen edge that moves under light pressure.
- Charging or heat behavior that changed after the phone came back.
Escalate in this order:
- Contact the provider and describe the symptom from your log — dates, conditions, and what you were doing when it appeared.
- Bring the paper trail: invoice, written warranty terms, the symptom log, and any photos or video captured when the symptom showed up.
- Ask for the diagnostic and the coverage decision in writing, and ask directly whether the issue is being treated as work covered under the repair warranty or as a separate problem.
- If the answer is no, escalate inside the shop before switching providers: ask for a manager, ask which written terms apply, and ask what the diagnostic actually found.
After that conversation, you have three realistic choices.
- Re-repair with the same provider. The better call while the window in your written terms is open and the shop is treating the issue as covered work, because it keeps one party responsible for the outcome.
- A second opinion. Reasonable when the coverage window has closed, when you cannot get a written answer, or when you want an independent read before spending more. Keep copies of everything and note who touched the device and when, so the second provider is not working blind.
- Living with the symptom. Sensible when it is stable, cosmetic, or does not interfere with the work the phone does, and when another repair costs more than the annoyance is worth. Keep tracking it — a symptom that changes character is a reason to revisit the decision.
Whether a symptom is covered is decided by the provider’s written terms and by rules that vary by state and plan. This is not legal advice, and the terms you were given govern.
Two weeks after a repair, the useful question is not whether the phone looks fixed. It is whether you can show what was done, what it cost, what is still covered, and how the device has behaved since. The work that gets you there is small: back up the device before it goes anywhere, run the counter check in order, keep a symptom log through the first week, hold on to the invoice and written warranty terms, and write down your downtime plan before the next screen cracks.
For a fleet, fold those steps into your process once — approval thresholds, data handling, and the documentation you expect back with each device — and every repair stops being an emergency. For a single phone, the checklist is roughly an hour of attention spread across a week, which is far less time than a disputed repair takes to untangle.